Making homemade jam is a rewarding and delicious process that allows you to savor the flavors of fresh fruits all year round. Here’s a step-by-step guide to mastering the art of making homemade jam:
Ingredients You’ll Need:
- Fresh, ripe fruits (e.g., strawberries, blueberries, raspberries, peaches)
- Granulated sugar
- Lemon juice (optional, for natural pectin)
- Pectin (optional, for firmer jam)
Equipment Needed:
- Large pot or saucepan
- Wooden spoon or silicone spatula
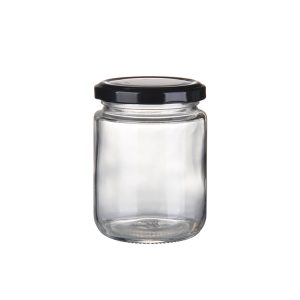
- Canning jars with lids and bands
- Canning funnel (optional, for easy jar filling)
- Jar lifter or tongs
- Water bath canner or a large stockpot with a rack
Step-by-Step Guide:
- Preparation:
- Wash the fruits thoroughly and remove any stems, cores, and pits. If needed, chop or crush the fruits to your desired consistency.
- Sterilize Jars:
- Wash the canning jars, lids, and bands with warm soapy water. Rinse them well.
- Place the jars in a large pot, cover them with water, and bring to a simmer. Simmer for about 10 minutes to sterilize the jars. Keep the lids and bands in hot (not boiling) water until ready to use.
- Cooking the Fruit:
- In a large pot or saucepan, combine the prepared fruit, sugar, and lemon juice (if using). The amount of sugar depends on the sweetness of the fruit and your preference for sweetness in the jam. A general guideline is about 1 cup of sugar per 1 cup of crushed fruit.
- Cook the fruit mixture over medium heat, stirring frequently to prevent sticking or burning. As the fruit cooks, it will release its juices and begin to thicken.
- Testing for Doneness:
- To check if the jam has reached the desired consistency, place a small plate in the freezer for a few minutes. Spoon a small amount of hot jam onto the cold plate and let it sit for a moment. Push the jam with your finger; if it wrinkles and holds its shape, it’s ready. If not, continue cooking and repeat the test after a few minutes.
- Optional: Adding Pectin:
- If you want a firmer jam or the fruit you’re using is low in natural pectin, you can add commercial pectin following the manufacturer’s instructions. Pectin helps the jam set properly.
- Filling the Jars:
- Carefully remove the sterilized jars from the hot water. Place a canning funnel over each jar to avoid spills.
- Ladle the hot jam into the jars, leaving about ¼-inch headspace (the space between the top of the jam and the rim of the jar). Wipe the jar rims clean with a damp cloth to ensure a proper seal.
- Sealing the Jars:
- Place the lids on the jars and secure them with the bands, but do not over-tighten. The goal is to allow air to escape during processing.
- Water Bath Canning:
- Using a jar lifter or tongs, carefully place the filled jars in a water bath canner or a large stockpot with a rack. The jars should be submerged in water with at least 1 inch of water covering the tops of the jars.
- Bring the water to a gentle boil, and process the jars for the time recommended for the type of fruit and altitude you are at (usually 10-15 minutes).
- Cooling and Storing:
- After processing, carefully remove the jars from the water bath and place them on a towel-lined surface away from drafts. Let them cool completely. As they cool, you may hear the lids pop, indicating a successful seal.
- Check the seals by pressing down on the center of the lids. If they don’t move or make a popping sound, the jars are properly sealed. If a jar didn’t seal, refrigerate it and consume it within a few weeks.
- Label and Store:
- Once the jars have cooled, label them with the type of jam and the date they were made. Store the sealed jars in a cool, dark place. Properly sealed and processed jars can last for up to a year.
Remember to follow safe canning practices to prevent spoilage and ensure the longevity of your homemade jam. Enjoy your delicious homemade jam on toast, pancakes, or as a delightful gift for friends and family!


